Rainscreen Facade Design: 9 Details That Keep Water Out
A rainscreen succeeds by expecting water, giving it a clear exit and keeping the inner control layers continuous—especially at windows, parapets, bases and penetrations.
By World Arch Journal ·

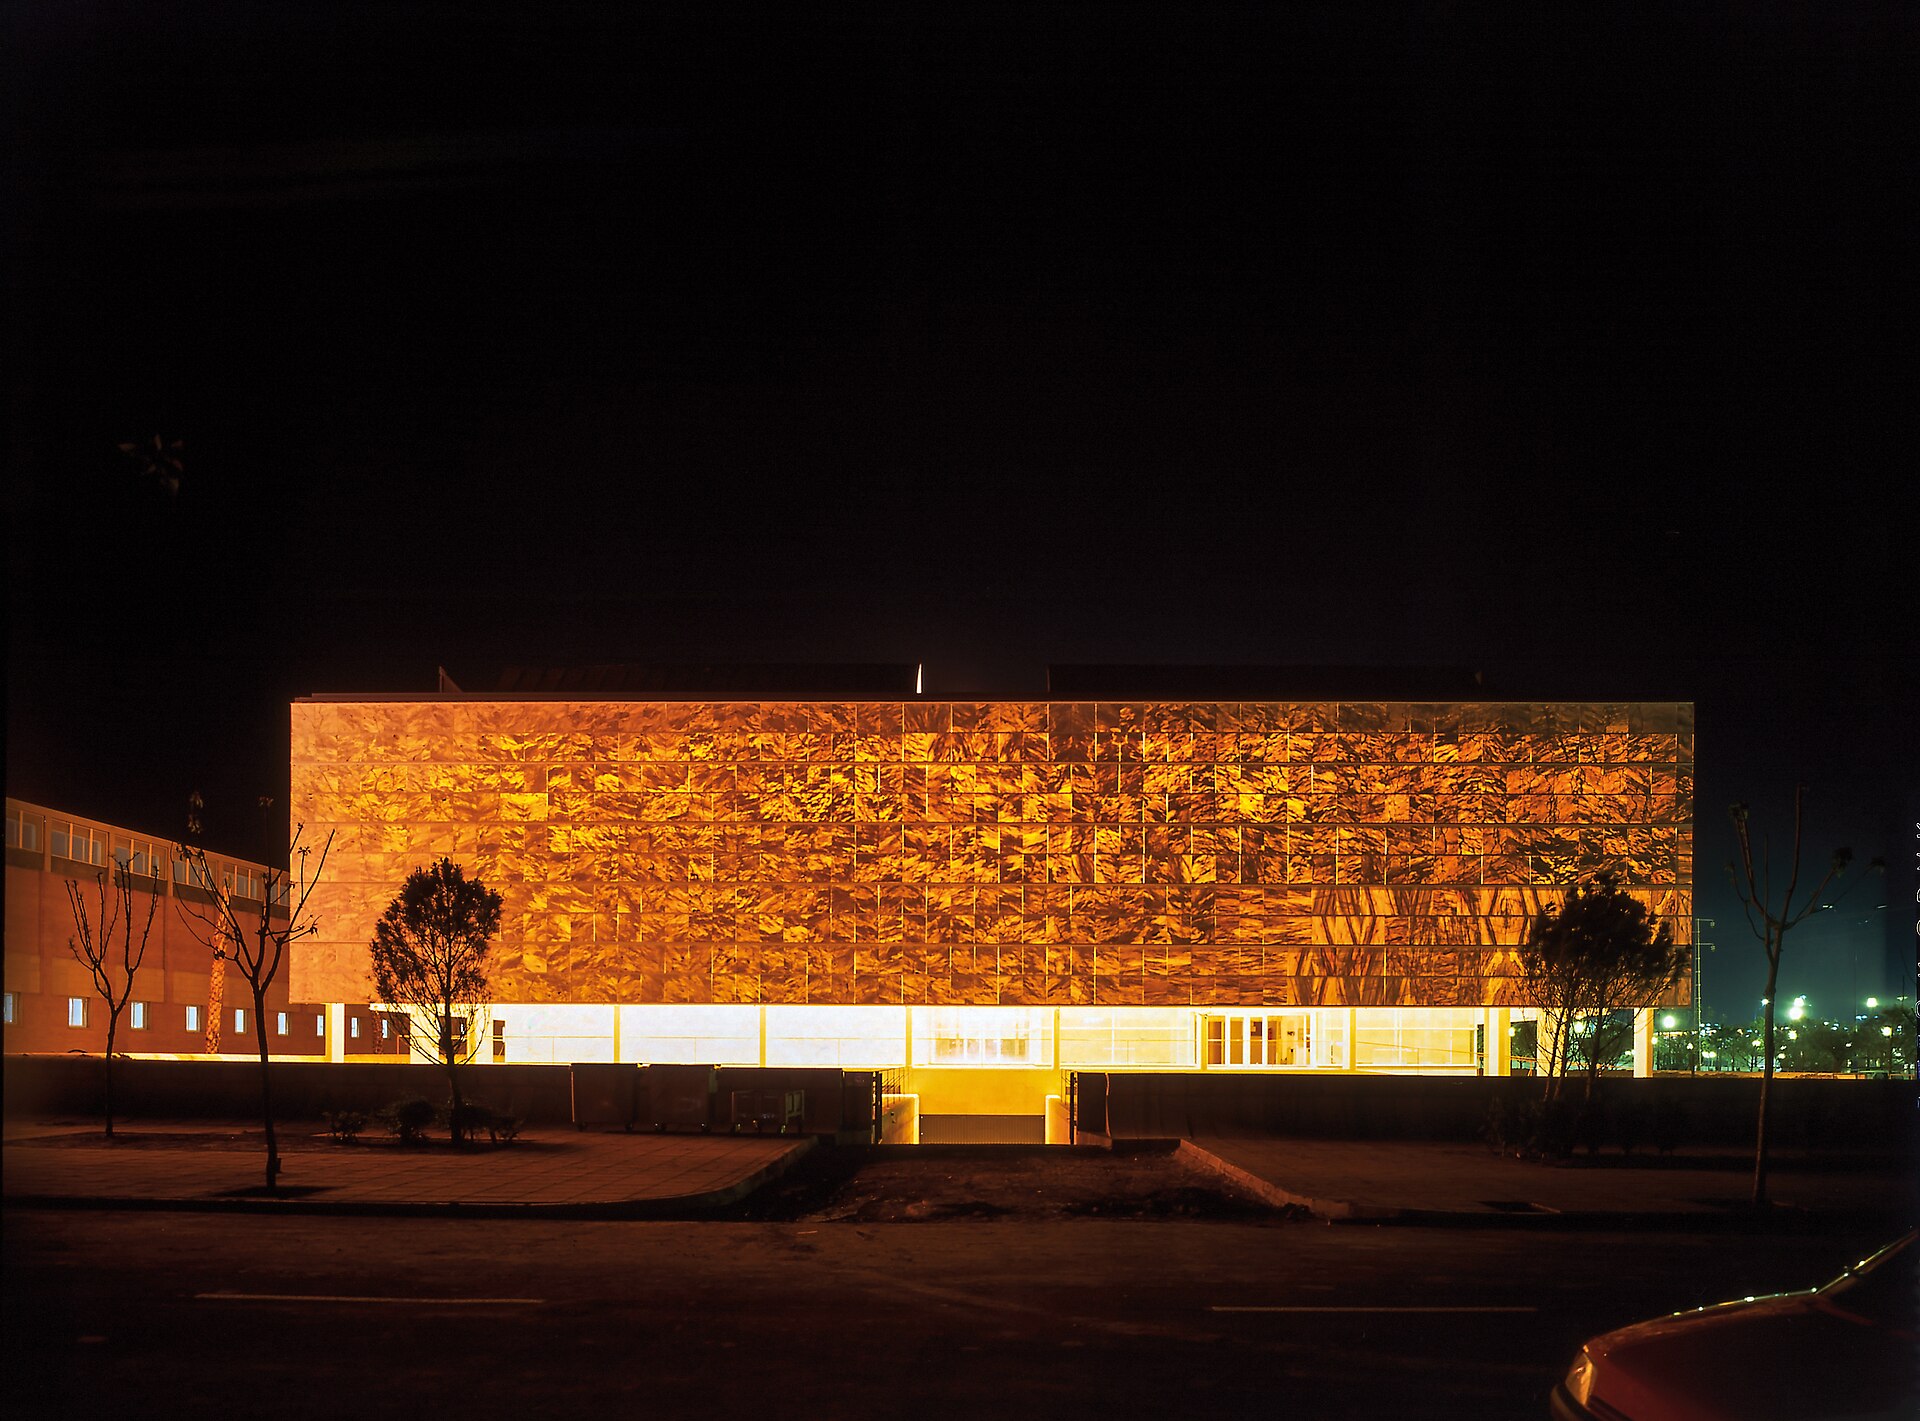
Project file
- FORMAT: Evidence-led international detail guide
- AUDIENCE: Architects, facade teams and students
- GEOGRAPHY: International · Climate and local codes apply
- EDITORIAL LEAD: World Arch Journal
- PUBLISHED: 26 September 2026
- VISUAL MIX: 3 licensed photographs · 2 original diagrams
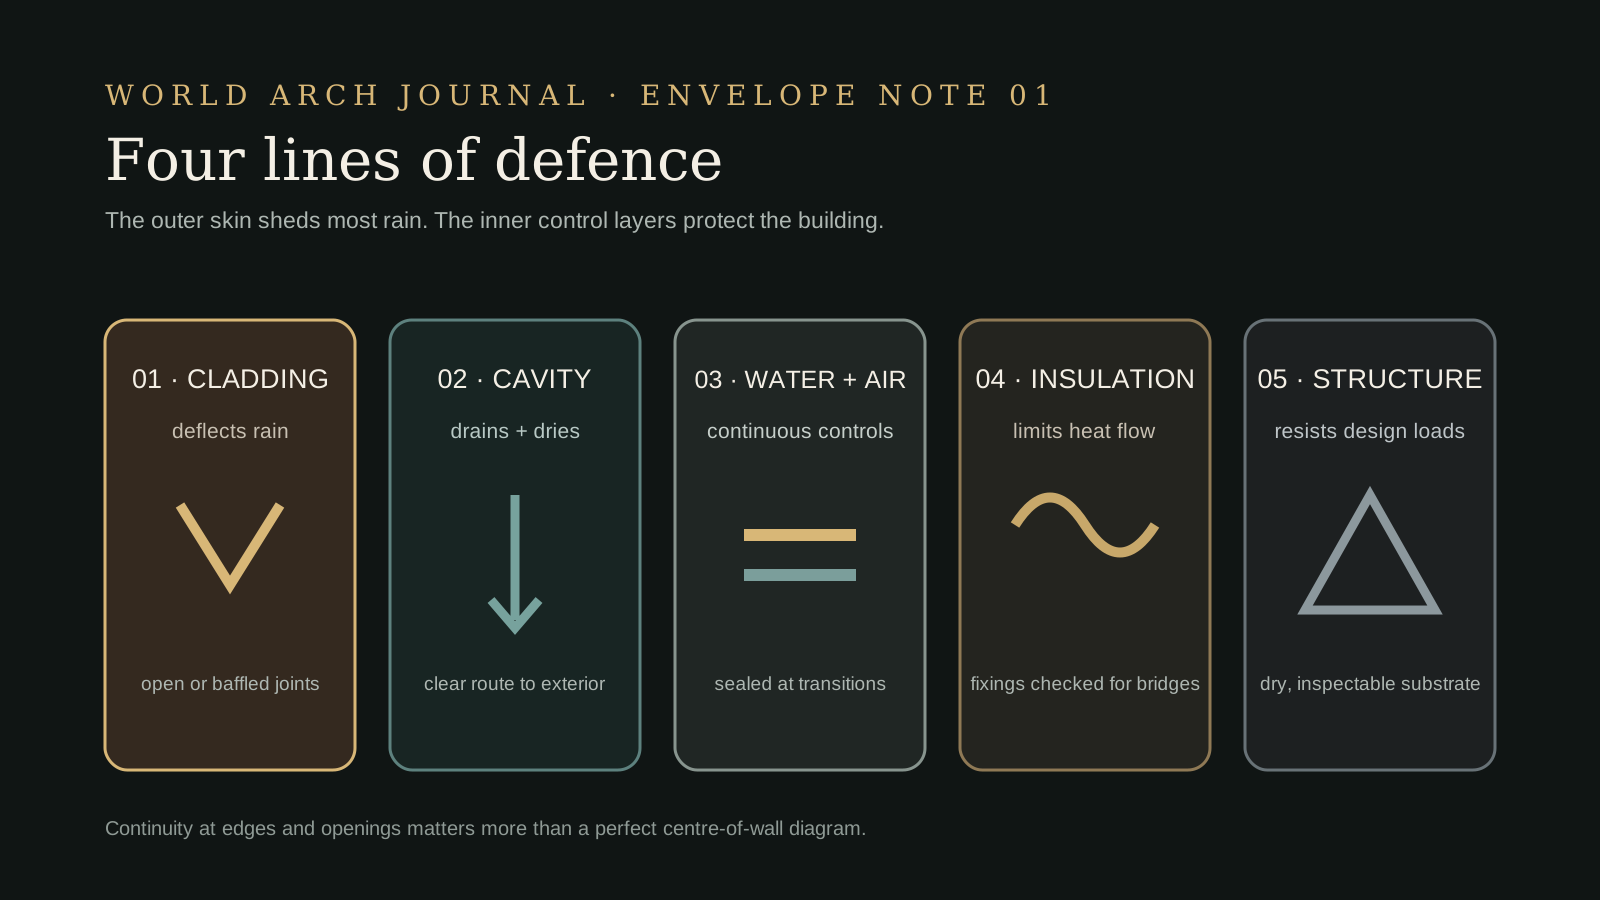
Rainscreen facades are often presented as a cladding choice: terracotta, stone, metal, fibre cement or timber panels held away from the wall. Their real value is not the visible material. It is the separation of duties behind it. The outer layer rejects most rain and sun; a cavity drains and may support drying; a continuous inner layer manages the water that passes the cladding; and the air, thermal and structural systems complete the enclosure.
This layered approach is forgiving only when the layers remain connected. A beautiful centre-of-wall section cannot compensate for a missing sill pan, a blocked cavity, an unsealed bracket, an inverted flashing lap or an open parapet transition. Most failures occur where systems meet and responsibilities blur.
The nine details below form an international design method rather than a universal specification. Cavity dimensions, membranes, fire barriers, fixings and test pressures must be selected for the project climate, height, exposure, material system and locally adopted regulations.
What a rainscreen actually does
Rain reaches a wall through gravity, raindrop momentum, capillary action, surface tension and air-pressure difference. A face-sealed wall attempts to stop all water at its exposed surface and therefore depends heavily on durable joints and near-perfect workmanship. A drained rainscreen assumes that some water will cross the cladding and provides a second, protected route to carry it down and out.
That distinction changes the design question. Instead of asking whether every cladding joint is watertight, ask where incidental water will travel, what stops it reaching vulnerable materials, and how it returns to the exterior. The cladding is the first line of defence, not the last.
A rainscreen is not a waterproof panel. It is a water-management strategy with a deliberate exit.
1. Design for water that gets behind
Open joints, porous materials, wind-driven rain and imperfect interfaces make limited water entry normal. Detail the assembly so gravity helps rather than harms it. Provide downward drainage, capillary breaks and outward-sloping flashings. Eliminate shelves, reverse laps and horizontal tracks that can hold water against the membrane.
Map the drainage route in section from parapet to base. At every interruption, draw the next safe surface and exit. Water should never rely on evaporation alone, and it should not cross inward to find a drain. If a cavity can collect debris or mortar droppings, specify measures that keep the drainage path open.
2. Keep the water-control layer continuous
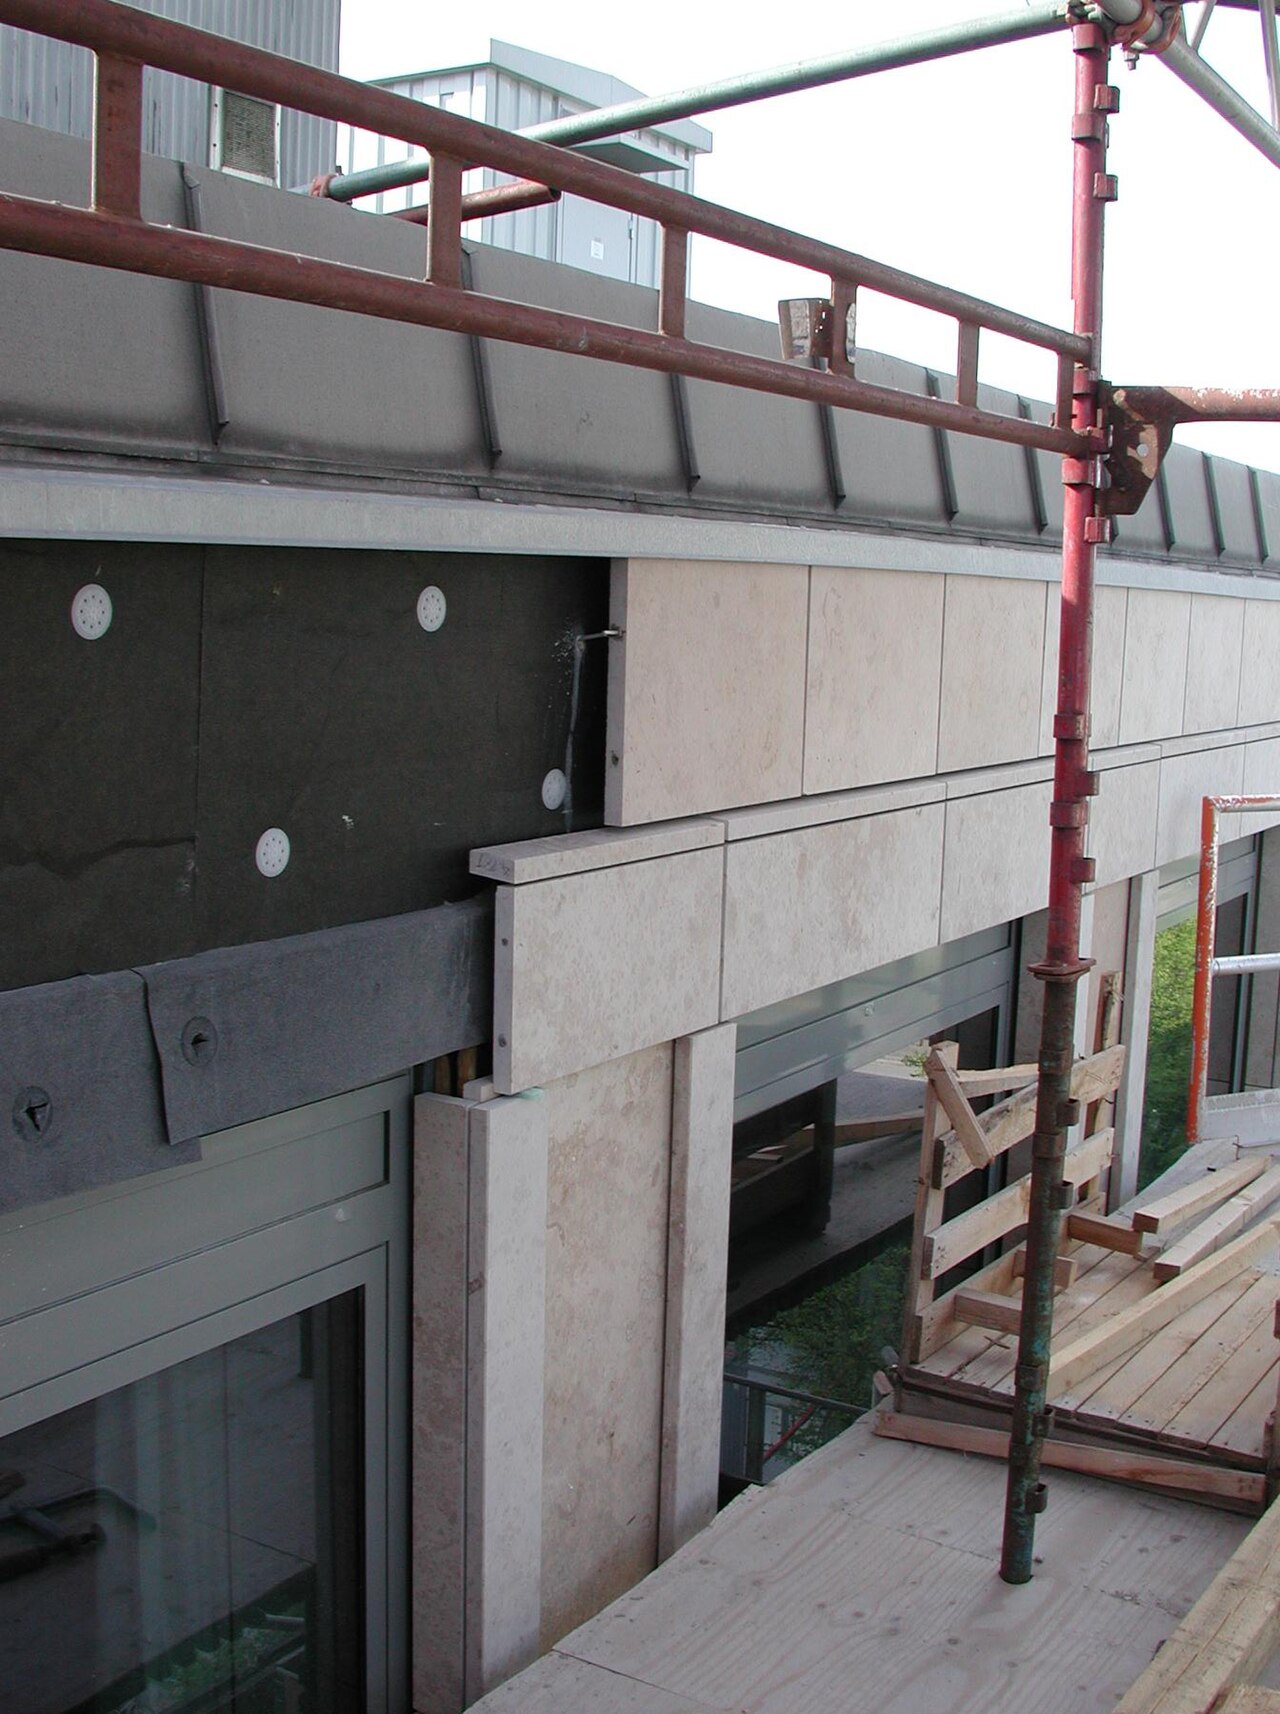
The water-resistive barrier or drainage plane must form a continuous surface behind the cladding. Depending on the assembly, it may be a sheet membrane, liquid-applied layer, taped sheathing or another tested system. Product choice matters less than continuity, substrate preparation, compatible joints and reliable transitions.
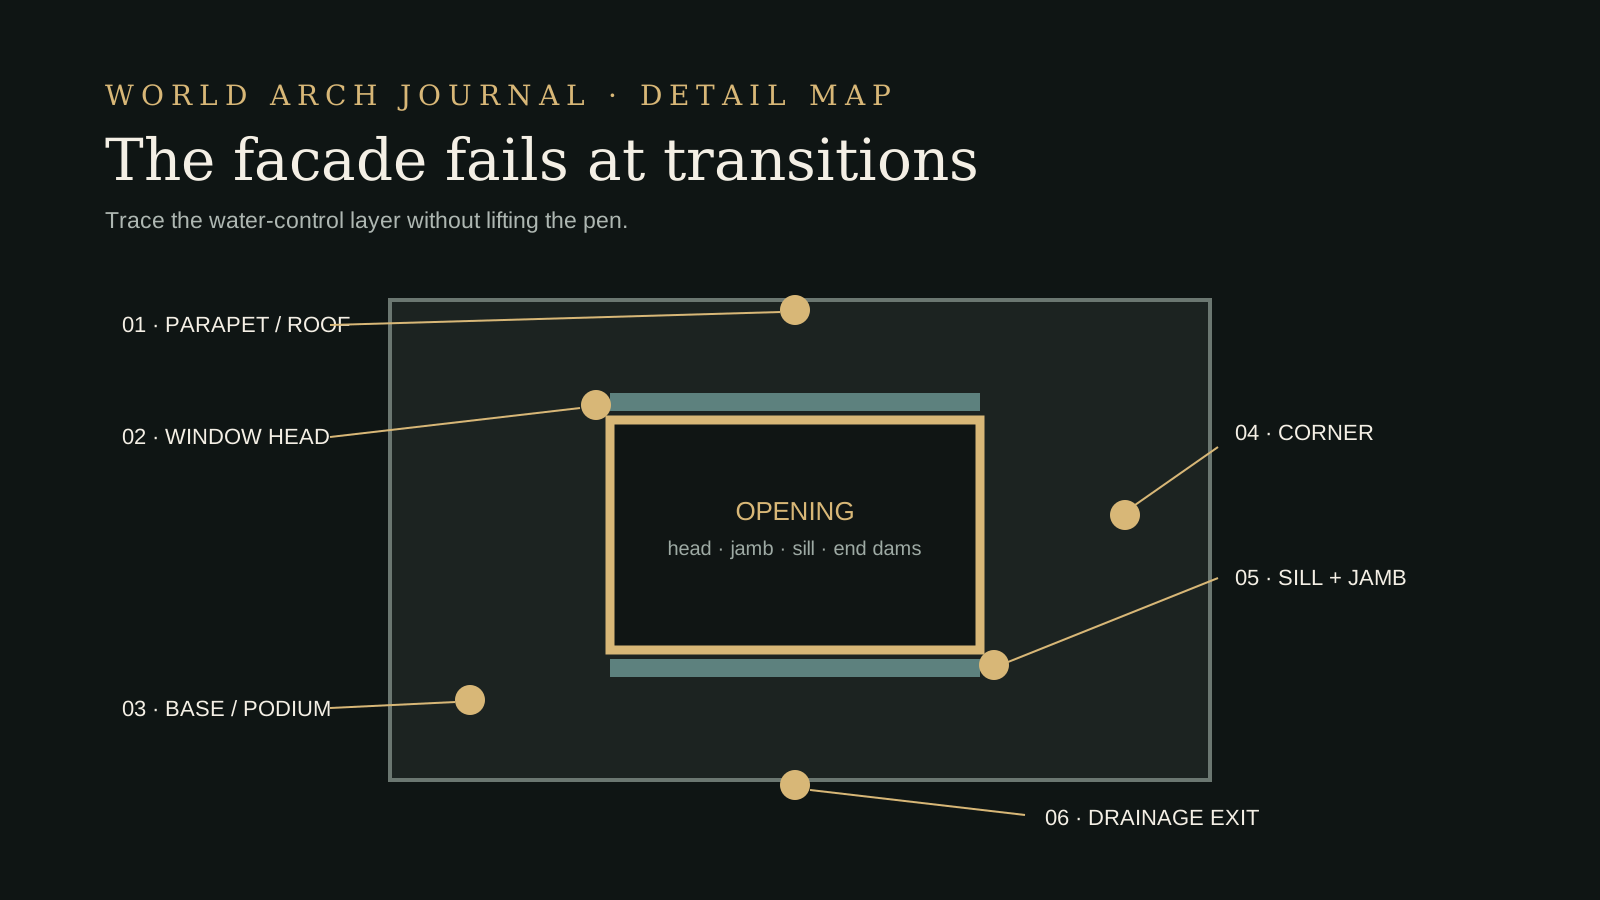
Draw the layer with one consistent colour through the entire envelope set. Trace it around corners, at floor edges, behind shelf angles, into roof and podium waterproofing, and around every opening or service. Define laps in the direction of water flow unless a tested sealed-joint system requires another approach. Coordinate the air-control layer separately even when one product performs both roles.
Compatibility is a design issue. Primers, tapes, sealants, membranes and transition sheets may adhere differently after heat, dust, moisture and construction movement. Require manufacturer-confirmed substrates and representative adhesion testing rather than assuming that two branded products will bond.
3. Flash every opening as a system
Windows and doors interrupt nearly every control layer. Treat head, jamb and sill as one three-dimensional water-management system. The head flashing should project and shed water beyond the opening. Jamb transitions should connect without holes at corners. The sill pan should slope outward, include a back dam and end dams where required, and lap to the drainage plane below.
Separate the exterior weather seal from the interior air seal. A backer rod and sealant joint exposed to sun and movement should not be the only defence. Provide a drained route behind the outer joint so leakage does not become wall damage.
Sequence matters. Draw which trade installs each transition and what must be inspected before it is hidden. A correct detail installed in the wrong order is not a correct assembly.
4. Protect the drainage cavity
The cavity needs enough clear depth and continuity to drain under real tolerances. There is no universal dimension: cladding absorption, joint geometry, exposure, subframing, ventilation intent and applicable standards all affect the choice. Research supports drainage gaps, but does not justify one global minimum for every assembly.
Check the cavity at bracket zones, horizontal rails, fire barriers, window perimeters and curved surfaces. Horizontal components should drain or be detailed so they cannot create reservoirs. At the base and above openings, provide visible exits that cannot be sealed accidentally by landscaping, sealant or later maintenance.
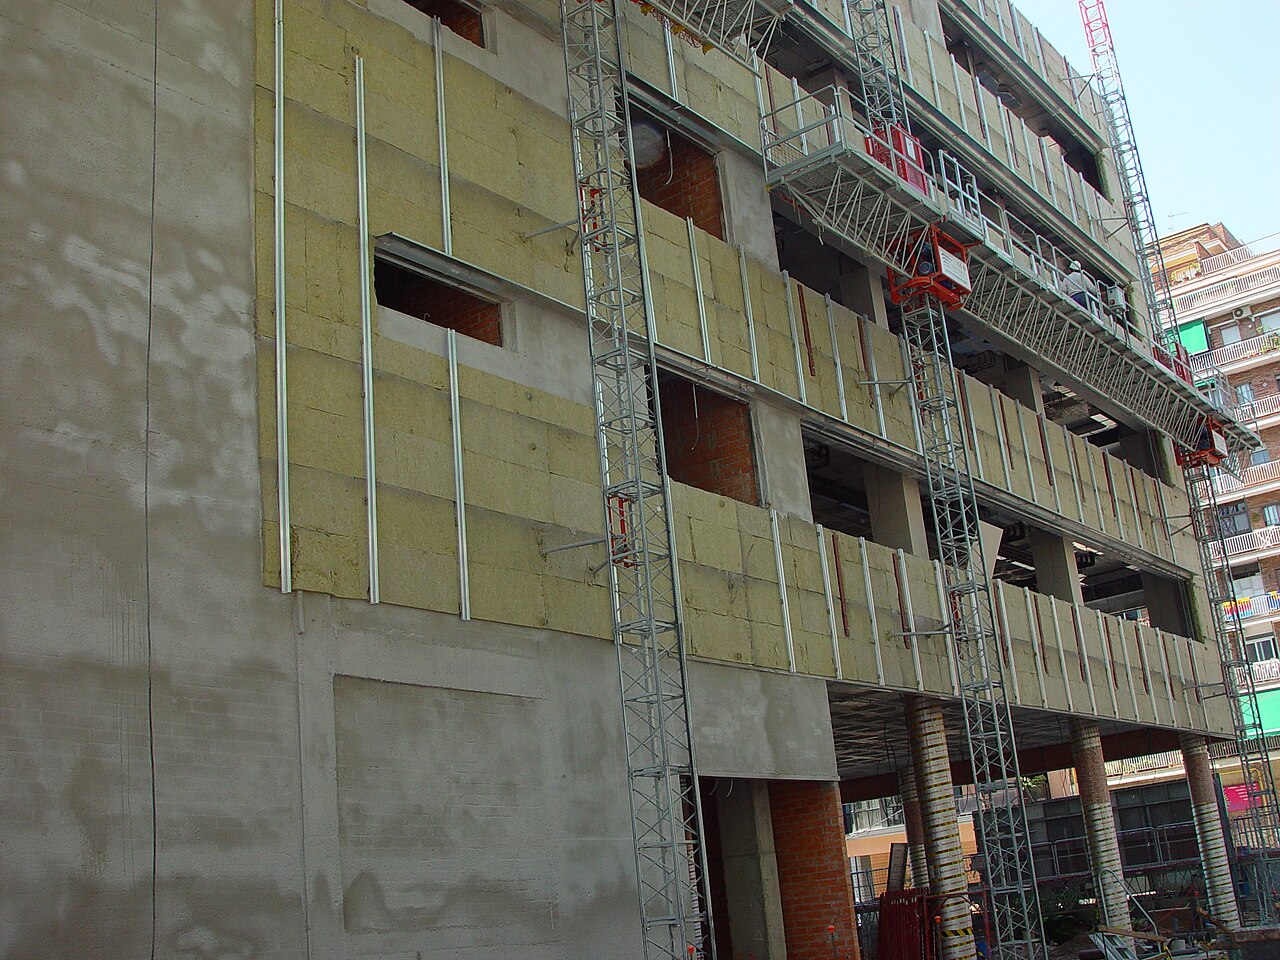
Account for construction reality. Mineral wool can bulge, fasteners can pull membranes inward and tolerances can close the gap. A mock-up should demonstrate the minimum clear path after all components are installed.
5. Ventilate only with a clear purpose
Drainage and ventilation are related but not identical. A vented cavity may have openings primarily at the bottom for drainage and limited air exchange. A ventilated cavity generally provides inlet and outlet openings that encourage airflow. Terminology varies internationally, so drawings should describe the physical configuration instead of relying on a label.
Ventilation can help remove moisture retained by absorptive cladding or wet construction, but more airflow is not always better. It can affect fire spread, wind behaviour, insects, acoustic performance and membrane exposure. Size and position openings according to a tested system or enclosure analysis.
Do not promise cooling solely because a facade is called ventilated. Solar heat, cavity depth, colour, openings, wind and insulation determine the outcome. Model thermal and hygrothermal performance when it is central to the design claim.
6. Earn pressure equalization
A pressure-equalized rainscreen is a specific refinement, not a marketing synonym for any open-jointed facade. National Research Council Canada guidance describes three essential parts: a vented rainscreen, a compartmented air chamber and an effective air-barrier system. Vents must allow the cavity pressure to respond quickly while delimiters reduce lateral airflow between zones with different wind pressures.
Perfect equalization is not achieved continuously in practice, and the wall must still drain water that enters. Corners and upper zones often experience larger pressure changes than the centre of a facade, so compartment size and venting may need to vary.
If the project has no pressure calculations, compartment strategy or verified airtight backing, describe it as a drained or ventilated rainscreen—not pressure equalized. Accurate language prevents the design team from assuming performance that was never engineered.
7. Resolve fixings and thermal bridges
Cladding loads travel through rails, brackets and anchors to the structure. Those same fixings penetrate insulation and often the water or air layer. Coordinate structural capacity, corrosion resistance, movement, tolerances, membrane sealing and thermal bridging in one detail.
Calculate point and linear thermal bridges rather than reducing performance to nominal insulation thickness. Stainless steel, aluminium and thermally improved brackets behave differently. Subframing layout may determine both energy performance and the embodied impact of the facade.
Allow differential movement between cladding, subframe and building structure. Stone, terracotta, fibre cement, metal and timber have different moisture and temperature responses. Fixed and sliding points, panel joints and anchors should follow the engineered system, not a generic elevation.
8. Coordinate fire and pest barriers
A continuous cavity can also become a route for flame, smoke, insects or birds. Fire barriers, cavity closures, screens and baffles must satisfy local regulations and the tested facade system while preserving intended drainage, ventilation and movement.
Do not improvise substitutions. Material combustibility, cavity geometry, insulation, membrane, bracket and cladding can interact in fire. Engage the fire consultant and system supplier early, especially for tall buildings, combustible components or open joints.
Detail maintenance access and inspectability. A perforated insect screen clogged by dust or paint may block drying; a fire barrier installed hard against a drainage exit may trap water. Each safety function must be coordinated rather than layered independently.
9. Test, inspect and maintain
Use a full-scale performance mock-up to coordinate interfaces, tolerances, appearance and installation sequence before repetitive work begins. Test the assembly with a project-specific protocol and acceptance criteria selected by the enclosure consultant. Standards for storefronts or curtain walls should not be applied blindly to every opaque rainscreen.
During construction, inspect the substrate, membranes, transitions, cavity depth, fastener seals, flashings and outlets before cladding conceals them. Photograph agreed hold points and record repairs. Water testing is most useful early enough to change the repeated detail.
Plan maintenance from day one. Identify sealants, flashings, drains, open joints and replaceable panels that require periodic review. Give the operator safe access and an illustrated facade manual. A rainscreen manages water for decades only when its exits remain open.
The rainscreen review checklist
| Review point | Required evidence | Warning sign |
|---|---|---|
| Water route | Continuous downward path and explicit exits | Water expected to evaporate from a closed pocket |
| Control layer | One traceable plane across all transitions | Membrane stops at window or slab edge |
| Openings | Head, jamb and sloped sill pan coordinated | Exterior sealant is the only defence |
| Cavity | Clear depth verified at rails and barriers | Insulation or debris blocks drainage |
| Ventilation | Defined inlet, outlet and performance purpose | Ventilated used as an unexplained label |
| Pressure | Air barrier, compartments and vent sizing | Open joints assumed to equalize pressure |
| Fixings | Loads, movement, corrosion and thermal bridging | Bracket treated only as a structural item |
| Safety | Tested fire and pest closures coordinated with drainage | Cavity barrier blocks the water exit |
| Quality | Mock-up, hold points, field checks and manual | Testing begins after most cladding is installed |
Design the interfaces, not only the facade pattern
The durable rainscreen is rarely the one with the most complicated cladding. It is the one whose control layers can be traced, built, inspected and repaired. Its openings drain outward, its cavity stays clear, its brackets respect heat and water, and its fire strategy does not cancel its moisture strategy.
Start with the whole-wall section, then spend design time at parapets, corners, windows, balconies, podiums and bases. When every transition answers where water goes next, the facade becomes more than a visual skin. It becomes a resilient enclosure.
Continue exploring: a rainscreen is a layered promise; the terrace threshold makes the same promise in miniature — read The Water Line — and compare cladding surfaces in the travertine facade studies — or, for the thermal half of the envelope story, work through our climate responsive facade guide. And where the facade meets a projecting slab, the junction rules change again — see our guide to balcony thermal bridges.
Frequently asked questions
What is a rainscreen facade?
It is a layered exterior wall in which cladding sheds most rain while a cavity and continuous inner water-control layer drain incidental water safely back outside.
Is every ventilated facade pressure equalized?
No. Pressure equalization requires an effective air barrier, appropriately vented and compartmented cavities, and engineering for the project wind conditions.
How wide should a rainscreen cavity be?
There is no universal dimension. The required clear depth depends on cladding, joints, exposure, drainage and ventilation intent, subframing, tolerances, fire barriers and local standards.
Where do rainscreen facades usually leak?
Risk is highest at transitions: window heads and sills, parapets, corners, balconies, penetrations, bases and interfaces with roofs or podium waterproofing.
Does an open-jointed rainscreen need a waterproof membrane?
It needs a continuous, project-appropriate water-control layer behind the cladding because open joints and imperfect interfaces allow rain to enter the cavity.
What is the difference between a rainscreen and a ventilated facade?
A rainscreen is the water-management strategy: an outer cladding that intercepts most rain, a drained and vented cavity, and a continuous inner water-control layer. A ventilated facade is one way to build it — cladding on a subframe with a ventilated cavity behind. Not every ventilated cladding is detailed as a rainscreen, and a rainscreen need not be pressure-equalized; the terms describe different layers of the same assembly.
Evidence and source notes
- Whole Building Design Guide — WBDG describes rainscreens as cladding, air cavity, drainage plane and airtight support wall working through multiple moisture-shedding paths.
- Whole Building Design Guide — Building-enclosure guidance frames rain control through deflection, drainage and drying and distinguishes drained from pressure-equalized approaches.
- National Research Council Canada — NRC identifies a vented rainscreen, compartmented air chamber and effective air barrier as essential components of pressure equalization.
- Building Science Corporation — Water-managed walls depend on a continuous drainage plane, drainage space, integrated flashings and weep openings.
- Building Science Corporation — Pan flashings at openings need outward drainage, a back dam, end dams and integration with the drainage plane below.
- Fenestration and Glazing Industry Alliance — AAMA 501.2 defines a diagnostic field water-check method for installed storefronts, curtain walls and sloped glazing.
Related architecture stories
- Low-E vs Triple Glazing vs Smart Glass: 8 Decisions That Matter
The best glazing is not the pane with the most layers or the darkest tint. It is the verified whole-window system that fits climate, orientation, comfort, daylight, controls and construction reality.
- Solar Facades: 9 Decisions Before Putting Photovoltaics on Your Building
A solar facade is an envelope decision before it is an energy decision. Nine practical questions — from economics to orientation, maintenance and replacement — that decide whether photovoltaics earn their place on a building's skin.
- Climate-Responsive Facades: 7 Strategies for Better Cooling
A climate-responsive facade is not a decorative skin. It is a coordinated environmental system that manages sun, heat, air and daylight before mechanical cooling begins.
📌 Never miss a story — add World Arch Journal as your preferred source on Google: https://www.google.com/preferences/source?q=worldarchjournal.com