The Water Line: Five Decisions Before a Terrace Door Detail
A beautiful linear drain is not a water strategy. Trace the whole path—from paving to outfall—before the threshold is built.
By World Arch Journal · Published · Download PDF ↓
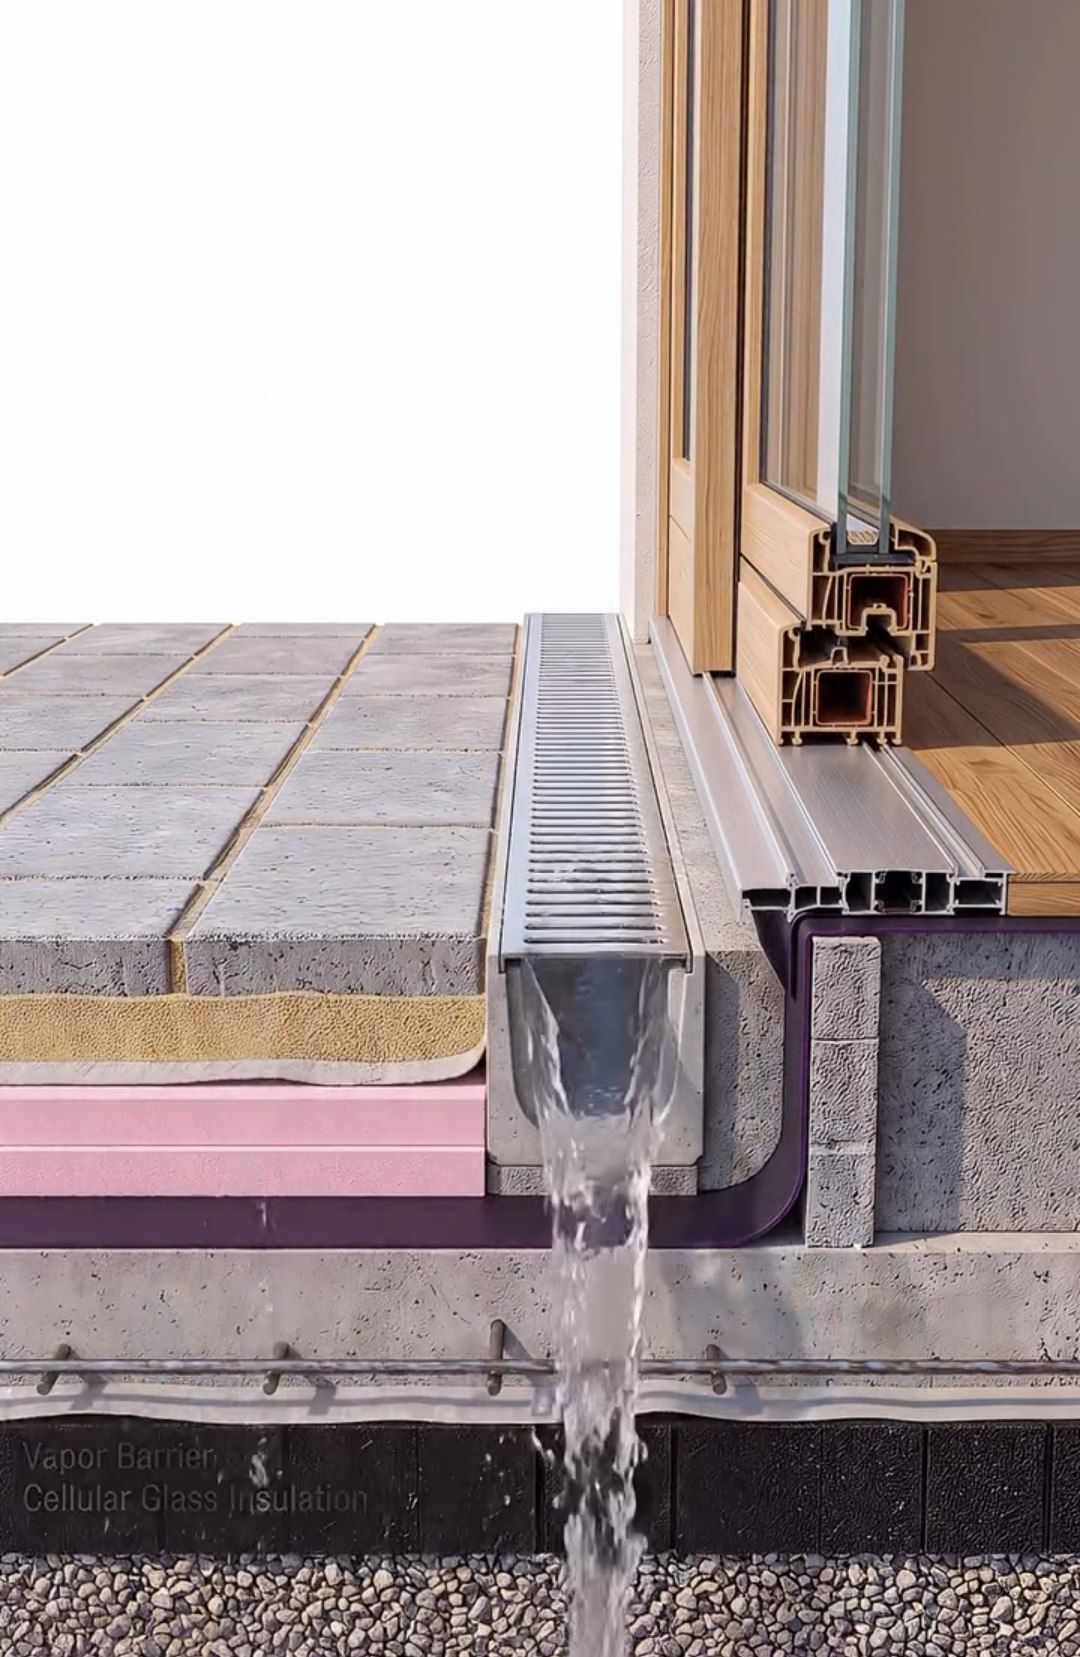
At a terrace door, water control is an assembly problem. The paving, drain, membrane, frame, structure and interior floor must work together. This field note turns a construction animation into questions a design team can use.
1. Draw the water path, not just the visible grate
Start with a section that follows rain from the paving surface to a safe, maintainable outfall. Mark where surface water goes, where water beneath the finish goes, and what happens if the drain is temporarily blocked. The drain is a collection point, not the whole system.
This is the first question we ask of the concept animation linked below: can a viewer follow the water beyond the attractive metal channel? If not, the visual is a prompt for design coordination, not proof of performance.
2. Keep the water-control layer continuous
A membrane on a slab only becomes useful when its edges, upstands and transitions are resolved. Show how the terrace waterproofing meets the door frame, adjacent wall and drainage body. At every junction, ask which layer sheds water outward and whether a later trade can puncture or cover it.
Building Science Corporation describes the drainage plane as a continuous water-control system that directs water down and out. The principle is transferable; the precise assembly and approved products still depend on the project.
3. Detail the outlet and future maintenance
A narrow channel can look discreet in a render, yet its capacity, outlet position and access for cleaning are engineering and maintenance questions. Document the outlet route, grate removability and inspection points. A convincing animation should never be mistaken for a drainage calculation or a manufacturer-approved installation.
4. Resolve the threshold as a thermal and access junction
The door threshold connects external paving, frame, structure and internal floor. Review insulation continuity, condensation risk, finished levels and accessible movement together. Lowering a threshold for easier passage can change the water-control challenge; raising it without coordination can create an access problem.
Passive House Institute identifies thermal-bridge avoidance and airtightness among its building principles. Neither is demonstrated merely by showing insulation boards in a video.
5. Test the sequence before calling it buildable
In the final detail package, number the installation steps and show which components must be inspected before they are covered. Confirm product compatibility, substrate preparation, penetrations, tolerances and the route for repair. Where the risk warrants it, use a project-specific mock-up and water test agreed with the design and construction team.
The best construction visual explains intent. It cannot certify workmanship, compliance with local rules, material suitability or long-term performance.
Further reading
- Watch the terrace threshold animation and copy the free prompt
- Read our guide to rainscreen facade water control
- Read the companion guide to balcony thermal bridges
- From the briefing: 5 October — Housing, Thresholds and Shared Ground
- Read the companion guide to flood-resilient homes
- From the archive: the 29 September briefing — architecture beyond the object
Source notes
These references inform the principles discussed here; they do not approve a particular threshold assembly.
Found an error or rights concern? Contact the publisher.
📌 Never miss a story — add World Arch Journal as your preferred source on Google: https://www.google.com/preferences/source?q=worldarchjournal.com